WordPress is one of the most popular content management systems in the world. It was originally designed to be a blogging platform, but it has evolved over time to become a fully-fledged CMS.
It is free and open source software that powers more than half of the websites on the internet. Not only that, but it is easy to use, highly customizable and extendable through plugins and themes.
Auto Installer by Hostinger will take you through the process in a few minutes. It’s a quick, easy process that won’t take up any of your time or energy. We will go over every step of the installation process in detail to make it as easy as possible for you to get your WordPress site up and running.
What is Hostinger’s Auto Installer?
Auto Installer is an app that you can use to install WordPress on Hostinger and other apps on your hosting account. It comes for free to use it in the dashboard of your hPanel account.
It offers a simple interface with instructions, which makes the process of installing an app very easy.
In order to install WordPress on hostinger, follow these steps:
Installing WordPress on Hostinger
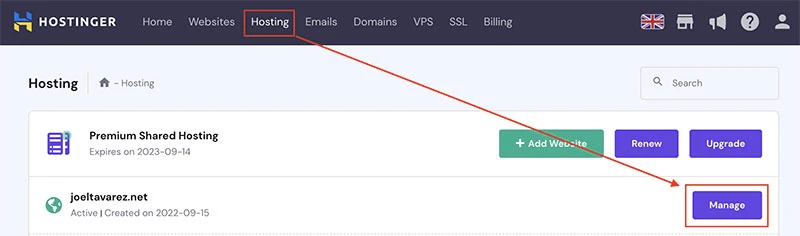
STEP 1. Open Auto Installer
After Login into your hosting account, select Hosting in the top menu. Then select Manage in the domain you want to install WP.
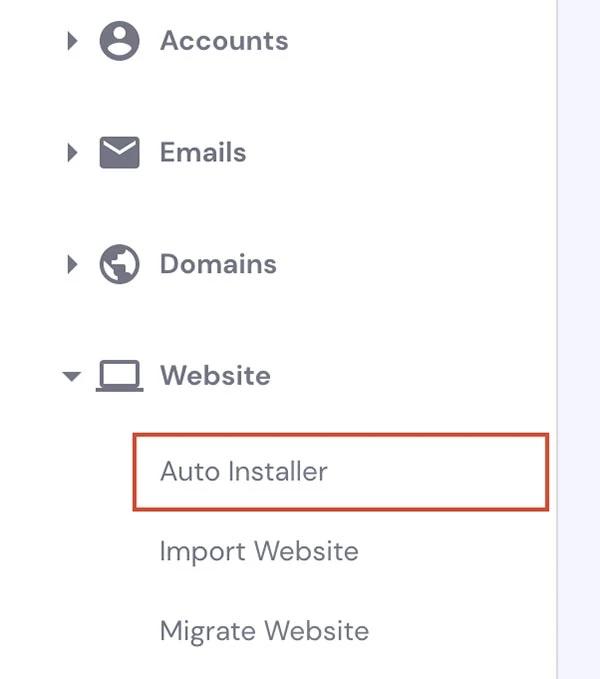
Search for Auto Installer in the left sidebar, and click on it:
In here, there are different options to installs others CMS. Select WordPress to install it:

Step 2 – Insert the installation details
Once you select WordPress as your required installation, there will pop up a tab. In here you can start the set-up of the installation. Fill in all the required details:
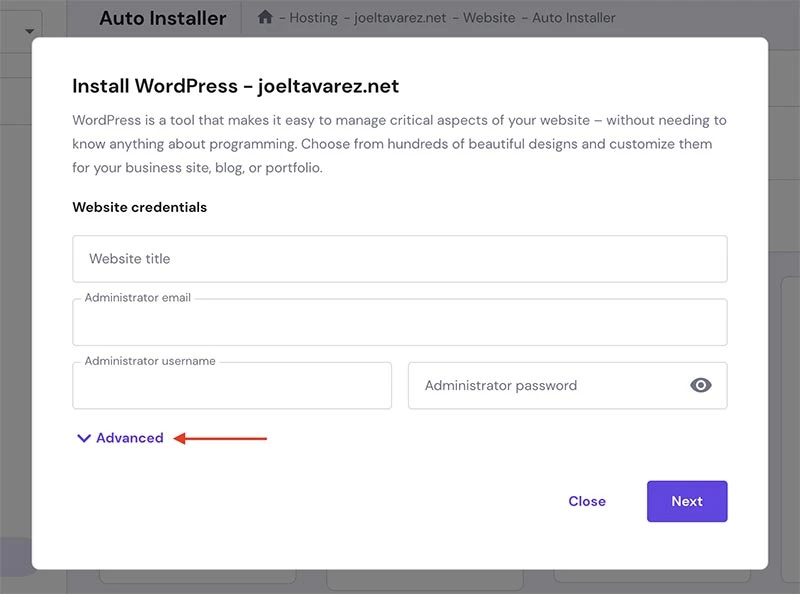
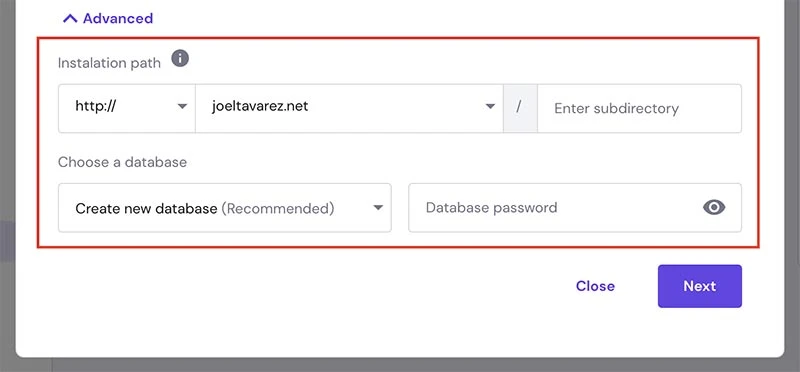
Press Advanced for more options. Here you can specify a custom subdirectory or use an existing database.
When you set that, click on Next, select application version, language, update settings, and click on Install:

If you don’t see any changes on your website after the successful installation and your domain is pointing to Hostinger, make sure to clear the browser cache.
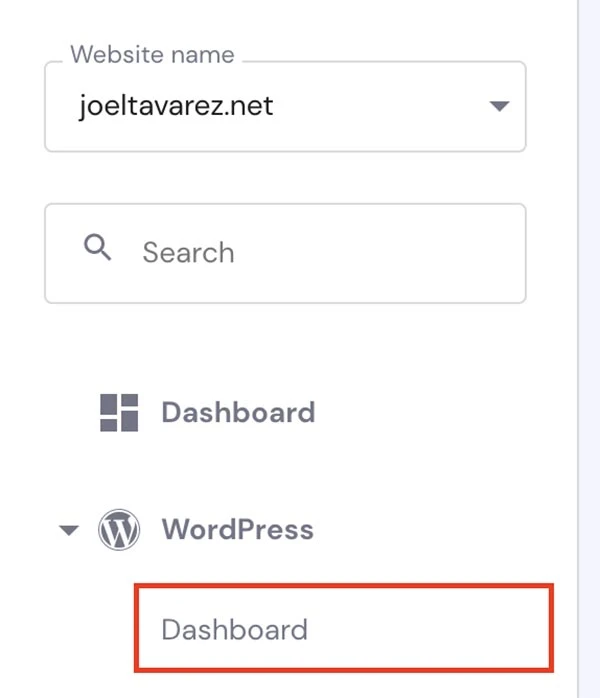
Step 3 – Access WordPress Dashboard
That’s it, the installation is complete. Now, you will be able to do a lot of things from the hPanel WordPress Dashboard:
If you want to learn how to use the WordPress Dashboard in hPanel read this article by Hostinger:
Is all set, now you can start building your website with a Page Builder available on JTools.